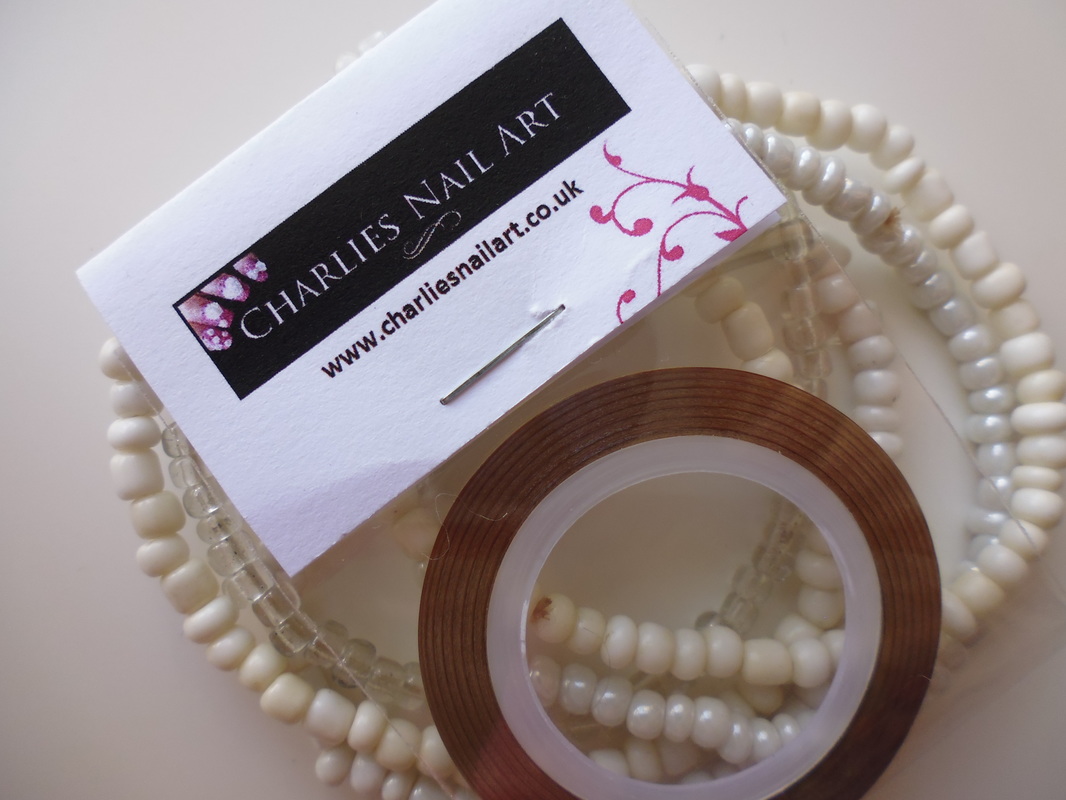
 I have to admit , my nail art is beginning to get a little better and I am starting to get a little more adventurous with the extra accessories which are available. For me , I have to admit I am not very good with the fiddliest of things , anything small that I can not control with my hands or a pair of tweezers are definitely a challenge for me . Over the past two years I have tried Striping tape previously but never really gave it the patience it deserves , I put it down to being left handed and not been able to hold and cut and place the tape all at once but this time I thought I would give it another try and this time in a gold but other colours are available . 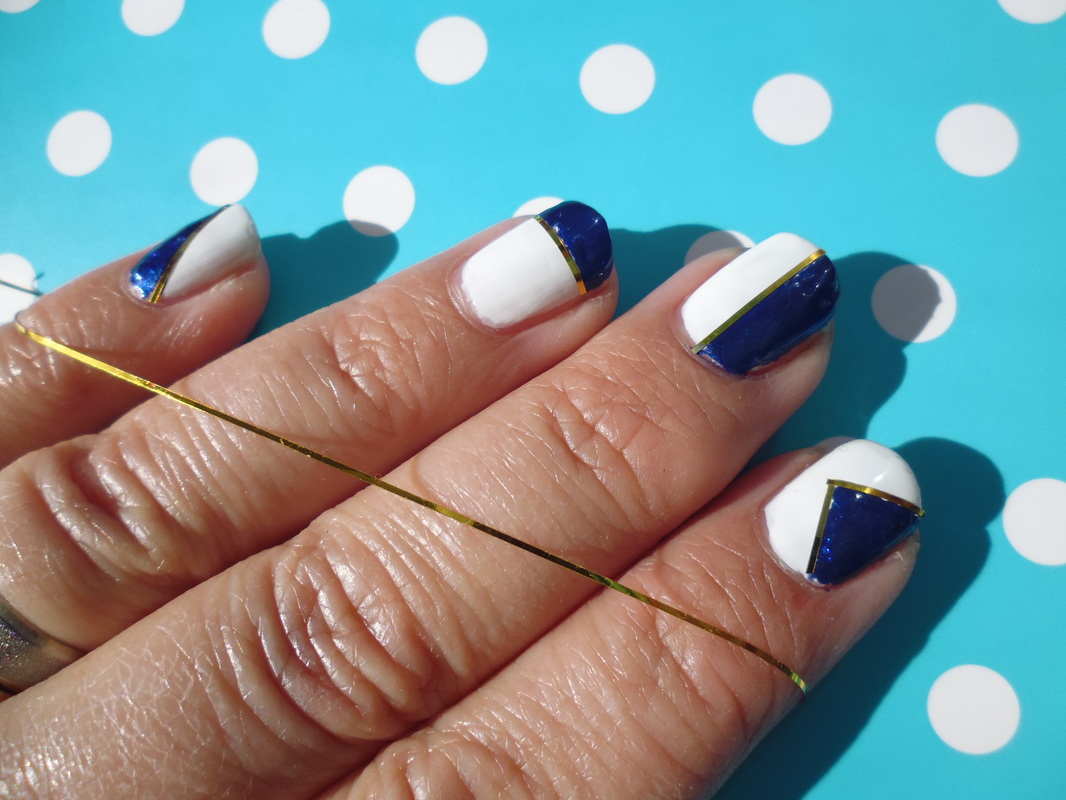 Striping tape is basically like a normal tape but for your nails so is a lot smaller and dainty in size . It comes in various colours , I in fact have it in red, blue, purple, green, gold and silver and it costs only 49p for an amazing 20 metres of tape which lasts as you can imagine a lifetime . The tape is sticky on one side and the foil like colour of this tape was gold , it looks like foil and also feels like foil but stronger in my opinion. Striping Tape Available from Charliesnailart.co.uk . Striping tape is used to make straight line designs or highlight design on your nails and because it is 1 mm thin it makes it easier to get that dainty yet bold statement. Because this is really the first time I have used this with a little more patience , you can clearly see it looks fantastic but I do think it takes a lot more patience or even artistic streak than I have, but I am sure practice will make perfect so I shall keep practicing. 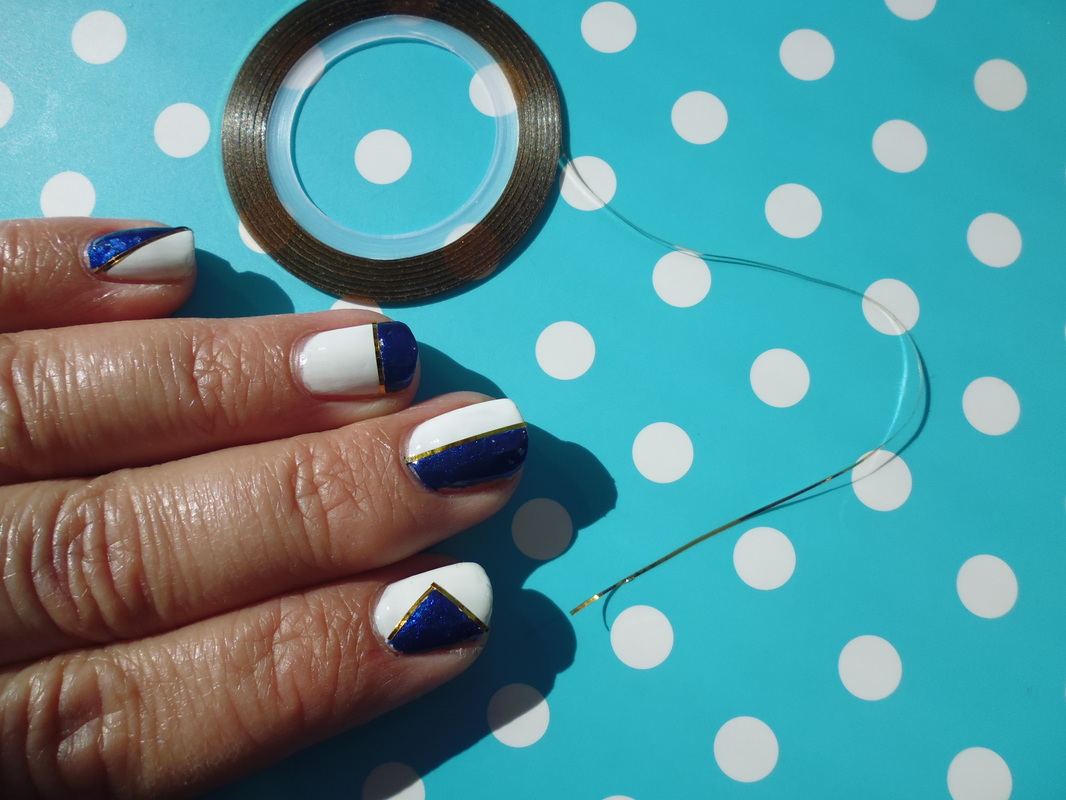 Directions to use -
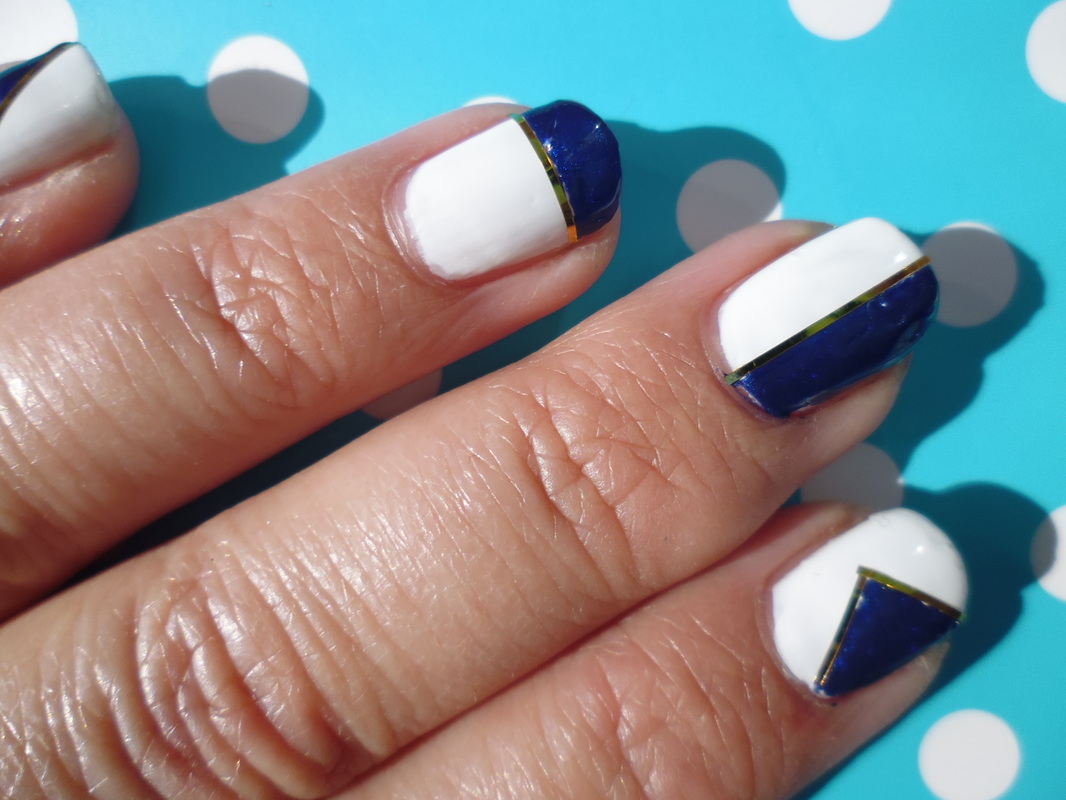 The Striping tape looked flat against the wall of my nail .
If I had left the pattern on my nails painted , you would see there was no bold straight line (I could never draw straight free hand ) and using the tape helped neaten this look quickly. Once a top coat had been applied I could not feel any lifting of the tape which deterred e from picking at them which is something I do on a regular basis when nail art has not been done properly, wasting time and effort as well as product so I was really pleased . Like I mentioned earlier it can be a little tricky but no more than any nail art using accessories. Have you tries striping tape or do you think it seems a little too tricky? Maybe you are a dab hand at freestyle drawing straight lines, let me know .
58 Comments
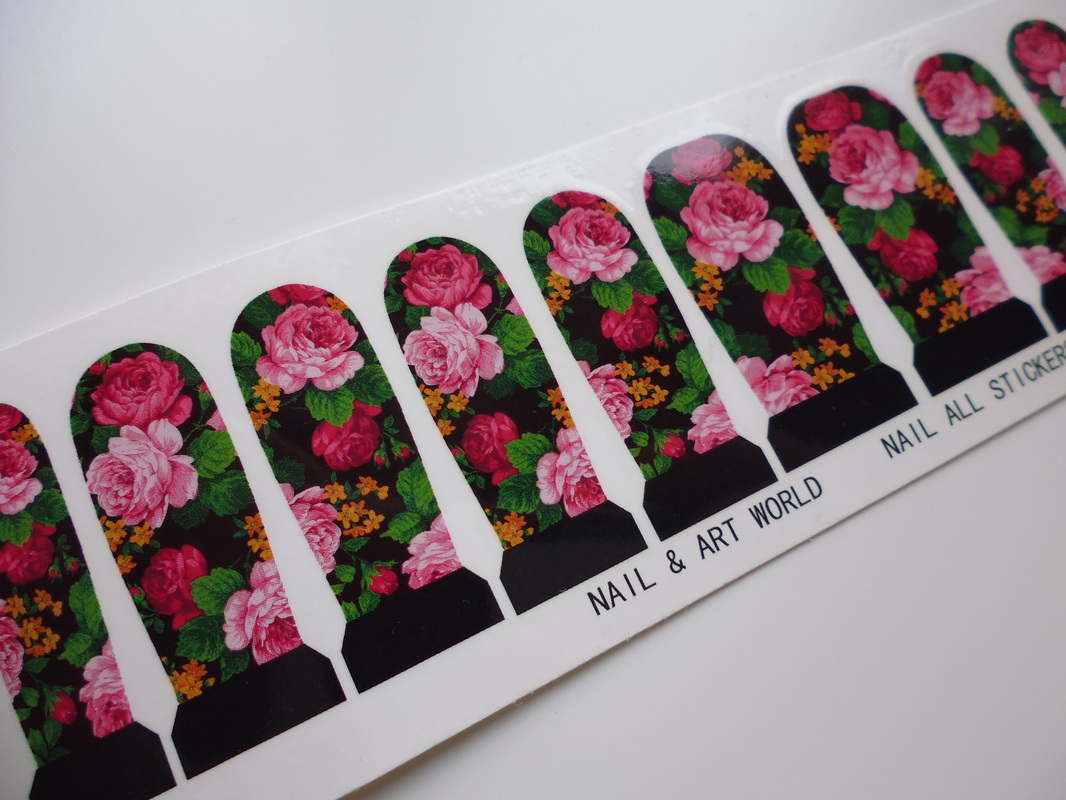 Ok , so I had something new over the Holidays for the nails which I was rather interested in giving a try. The water decal has been one of my most loved nail accessories lately and it was lovely to see that they have brought out the full nail wrap style decal to cover the whole nail. This time I was given the chance to try the Flower Nail Art Wrap from Charliesnailart.co.uk and they looked just the same as the ones I used to give a whirl a few summers a go . The difference with these wraps are that they are not actually stickers though, instead these are transfers so are a lot thinner making them more manageable to apply to the nail more precisely and smoothly. As with all Water Decals, I cut each section into the size I needed for the nail and placed them facing upwards into a bowl of water . After giving them around 20 seconds , the transfer had loosened itself from the paper backing and was able to be easily removed from the water and leaving a slightly tacky feeling , it was able to stick to the tip of my finger which made it easy to hold and put into place on the nail itself. 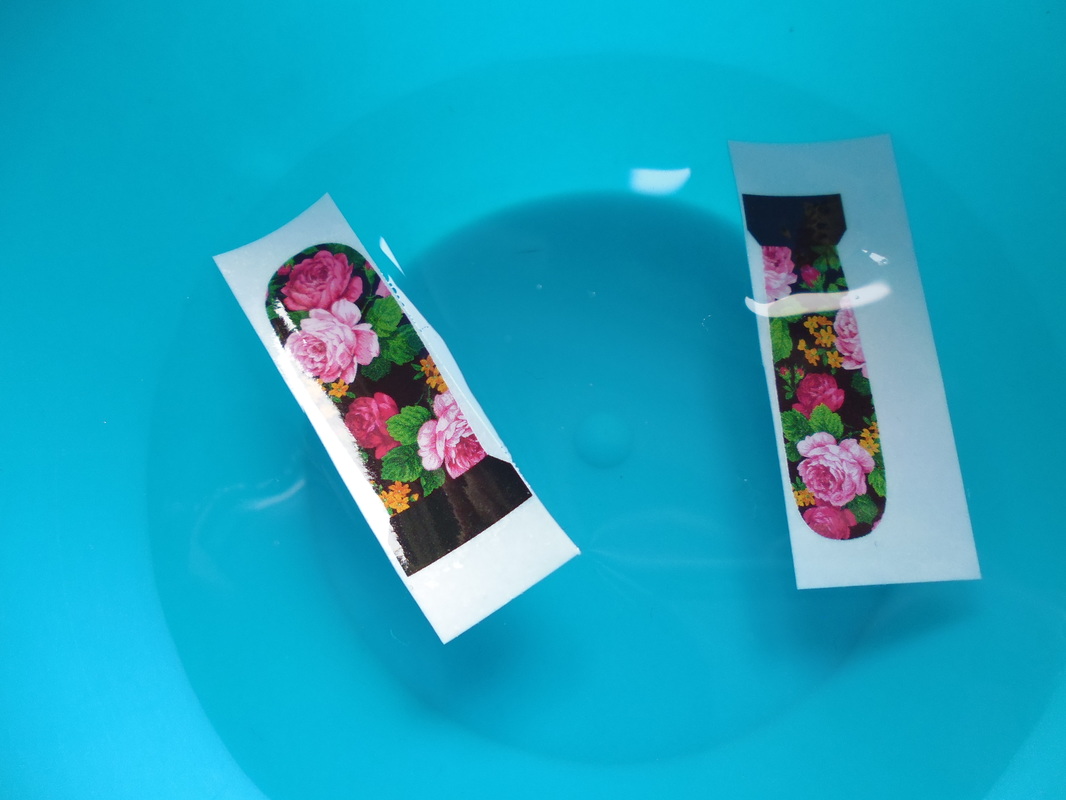 I did not need anything other than a small pair of scissors and shallow bowl of water for this process. 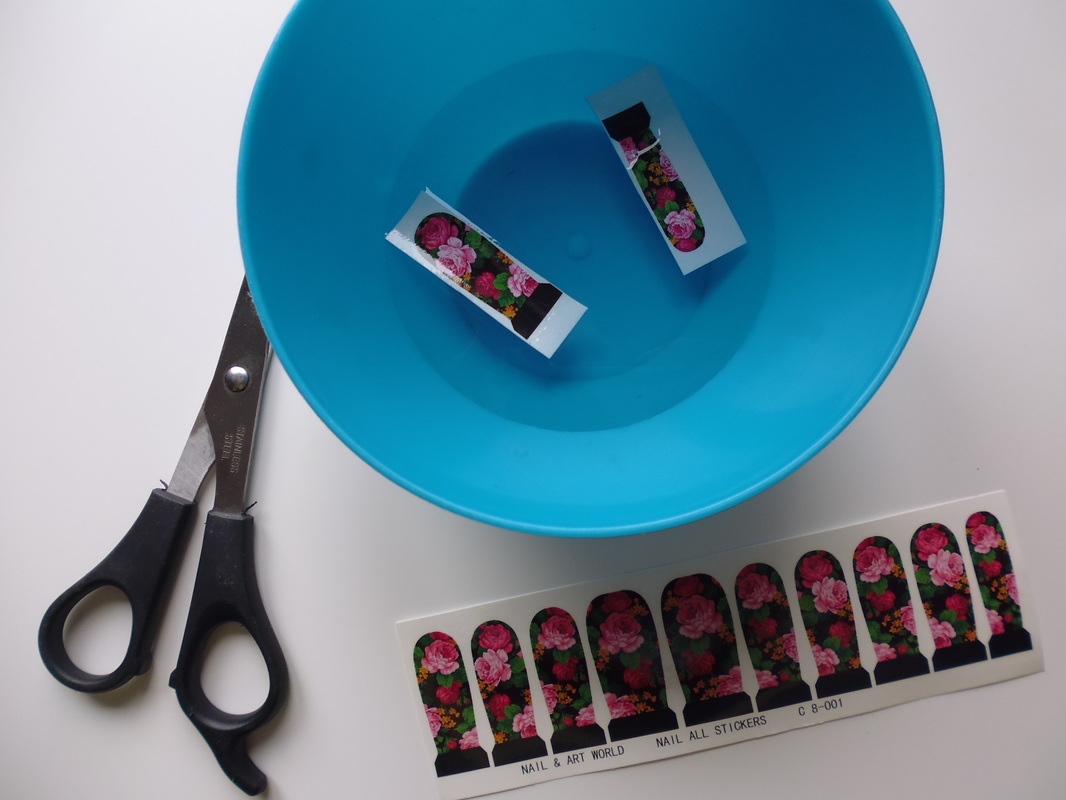 The Flower Nail Wraps are only 89p and you get enough to do a pair of nails just the once which I think is reasonable . 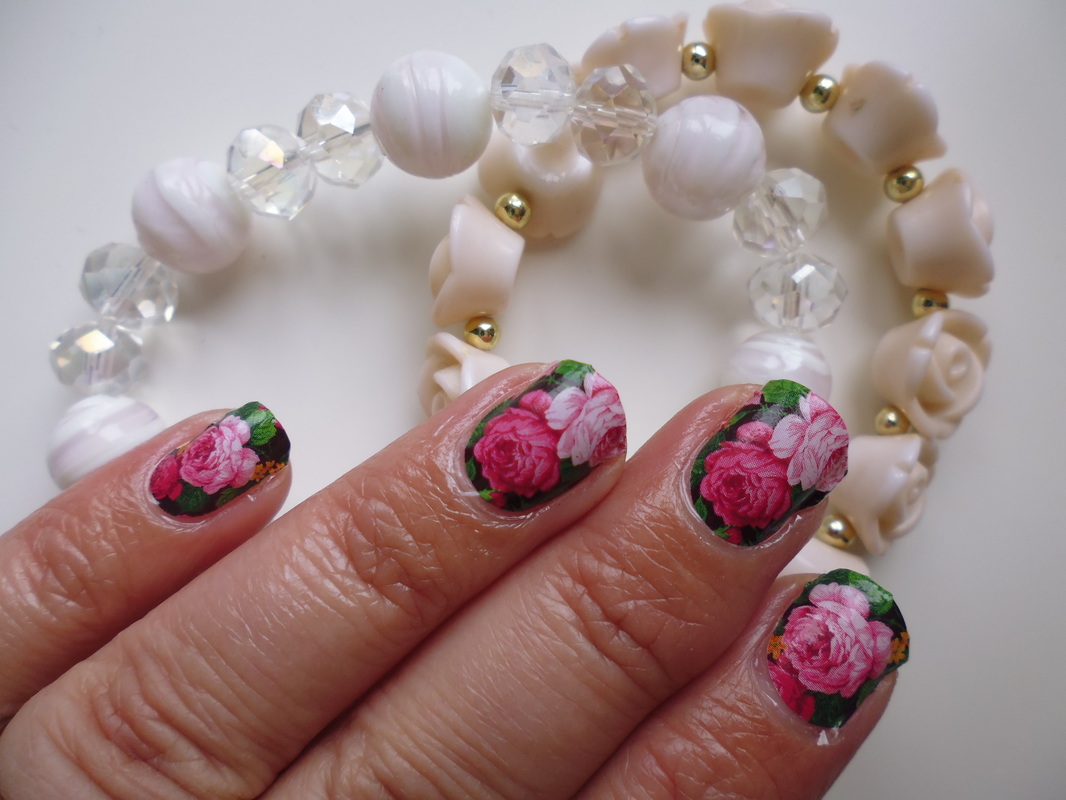 At first I realised that the decals were not varied in sizes as much as I would have liked , I think I would benefit from a few different sizes but if these are a little large for your small nail beds, they can be cut previous to fit , I merely think that the larger nails would have a struggle . The application was very easy and they stuck to the nail bed easily , you do need to make sure that the nail bed is totally dry as it takes the whole process a lot longer if it is wet. As you can see it looks lovely when finished although being my first attempt, I think I would benefit from a little more practice on the edges . 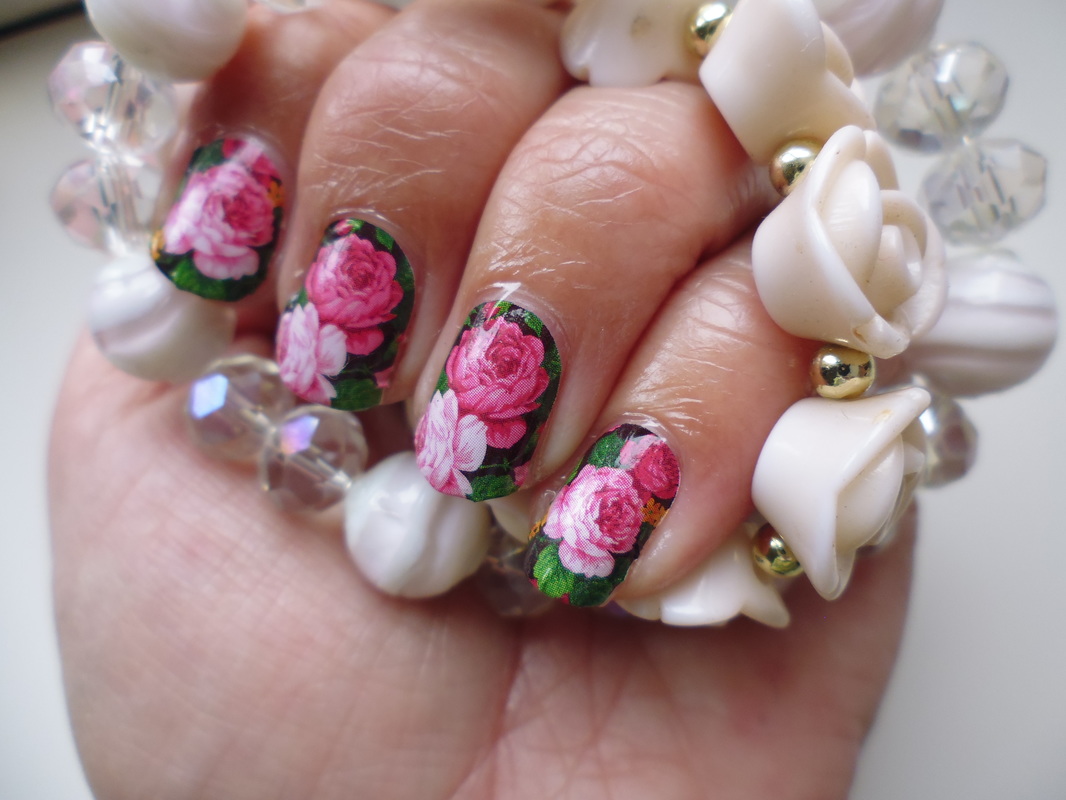 It is a lovely quick and easy way to make your nails look amazingly pretty in only minutes and I for one love the finishing effect which is left from such an affordable product.
I for one have seen people spending a fortune on items and salons to get the same look and I for one think this is achievable for most people without the huge cost and unneeded time loss. So what do you think of the Floral nail Wraps? 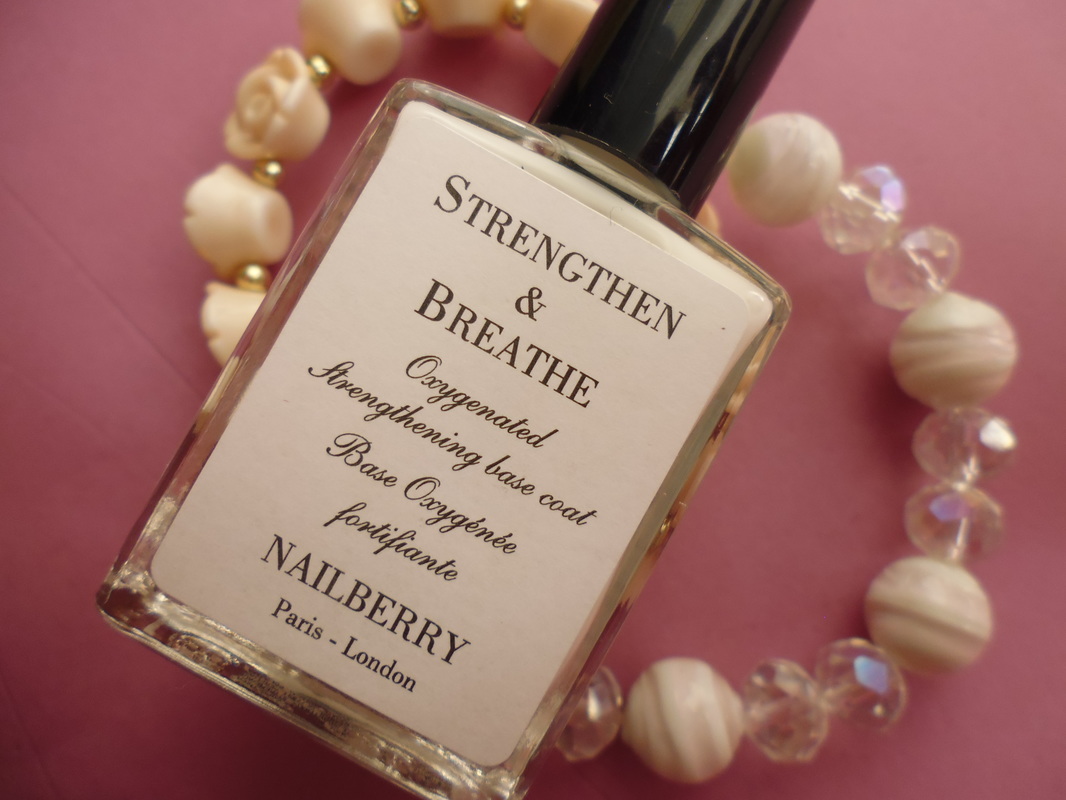 So I know I have already shared with you my Nailberry collection but for the past three weeks I have been trying something new out which is Strengthening my nails so I can bare all! For the past few months it has become apparent that a new trend is setting in a way that makes life a little easier for us ladies who work, parent and have no time for pampering and that trend is The Bare Nail Trend. 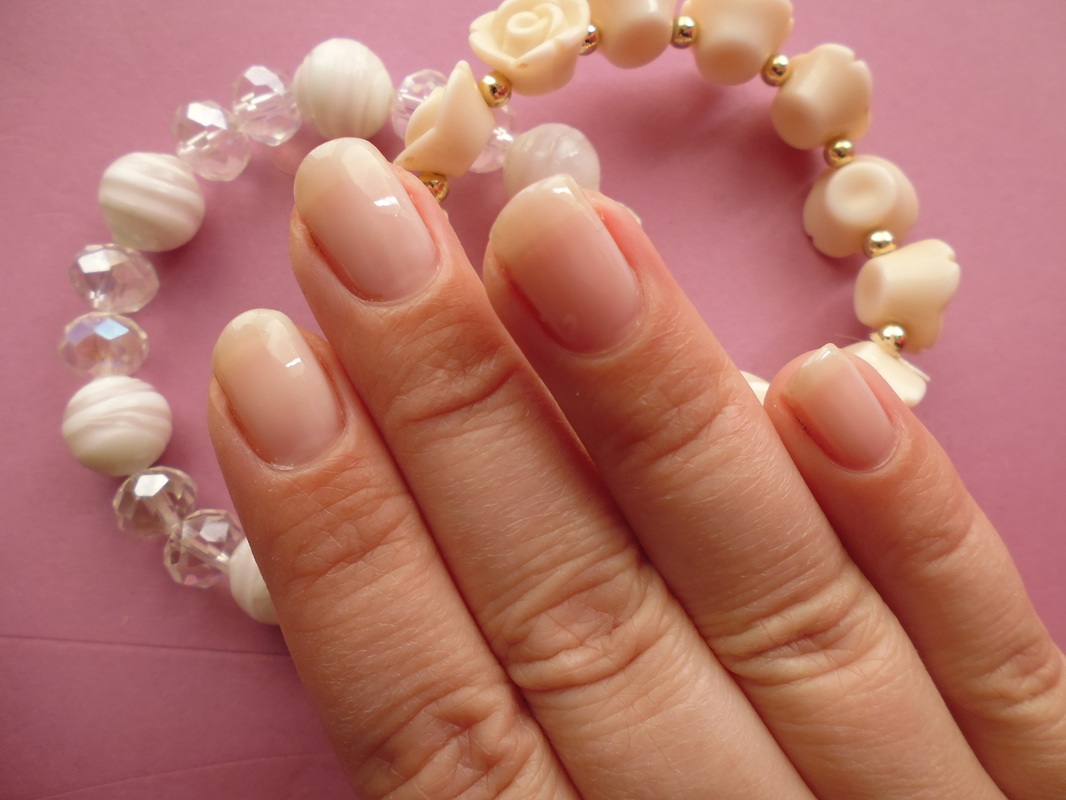 If you remember or were involved in last years nail trends , you may remember that it was all about making a statement from the bold and artistic design to the manageable manicures which gave the half crest moon on the cuticle rather than the tip and for me , I just simply had no creative desire to enjoy the artistic side of it when I could not take the time to apply it to my nails or visit a salon . I simply need something quick and although I do sometimes enjoy a bit of creativity or style on my nails, the baring it naturally is my most loved and easiest look and I am so pleased to see it finally become a trend for this upcoming Spring /Summer. Although the square look is a favourite to some , I am so pleased to see that the rounded nails hit the New York Fashion Week giving the more sophisticated and chic look to anyone who wears it especially in Deep blues or natural tones . I have always struggled to get that long nail look so have been pulling out my Nailberry Strength and Breathe and keeping my nails bare and adding just a coat of the wonder when ever I found time to and am feeling amazingly happy with the results which have come out of only three weeks of wearing it . On trend if you do not really love the baring it all natural look and wish to add a little art to the nails are the Negative Space nails (which is basically a hint of colour in V-Shapes or any slight geometric pattern) . The great thing about it though is that it does not need to be perfect and although white looks clean and neat , you can use any shade from that blood red, blues, greys or any of the top natural hues that seem to be making it large in the catwalks this year. 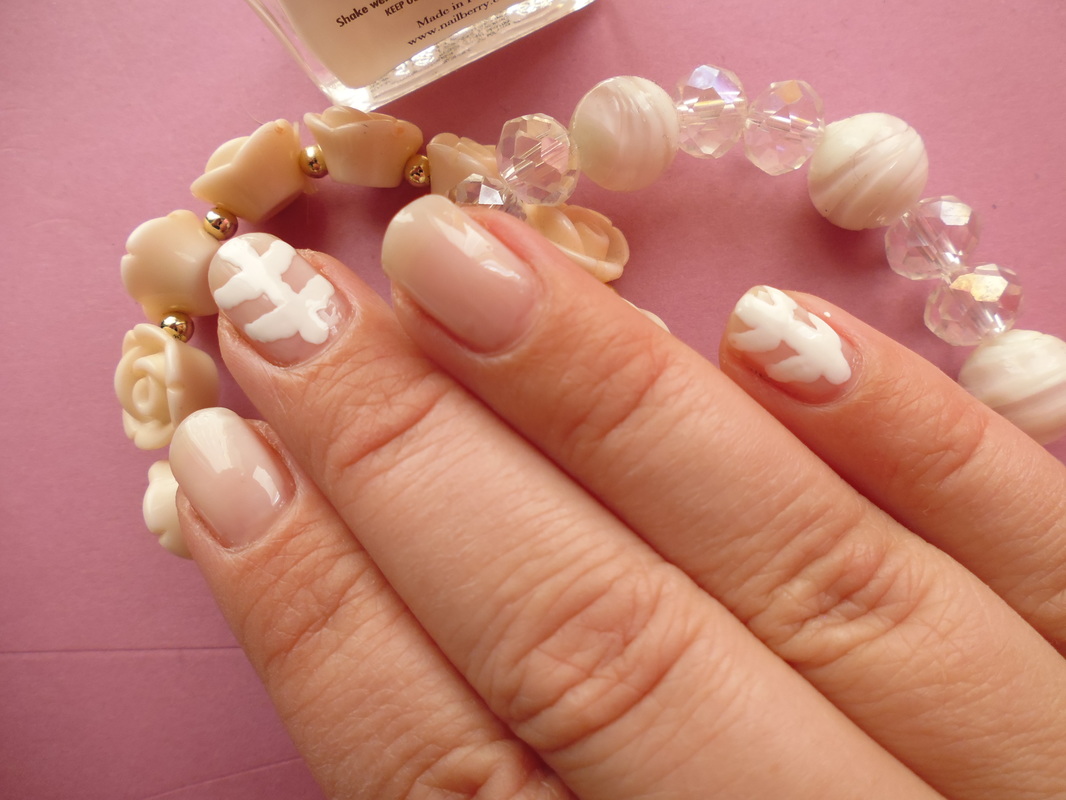 I am loving how my nails are growing stronger,maybe that has something to do with with my pregnancy hormones as well as the added help from the Nailberry strengthener, but having plain nails and baring it all seems to be one of my favourite looks so far this year so will you be giving it a go , let me know. 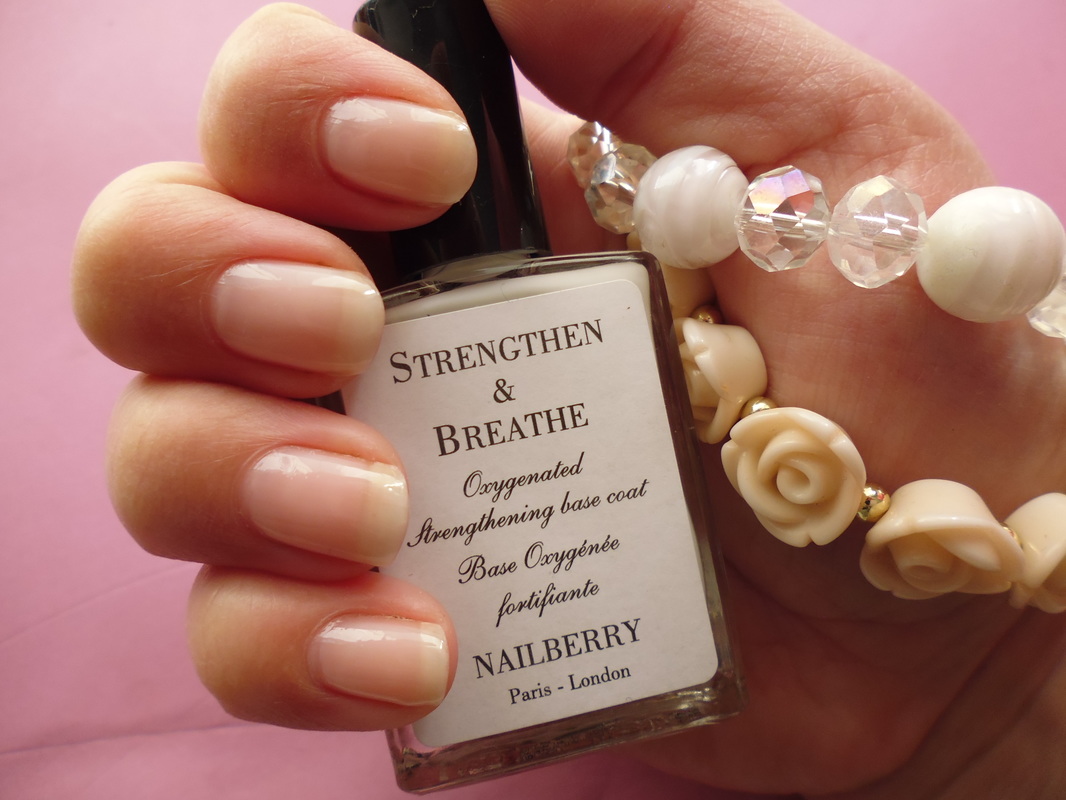 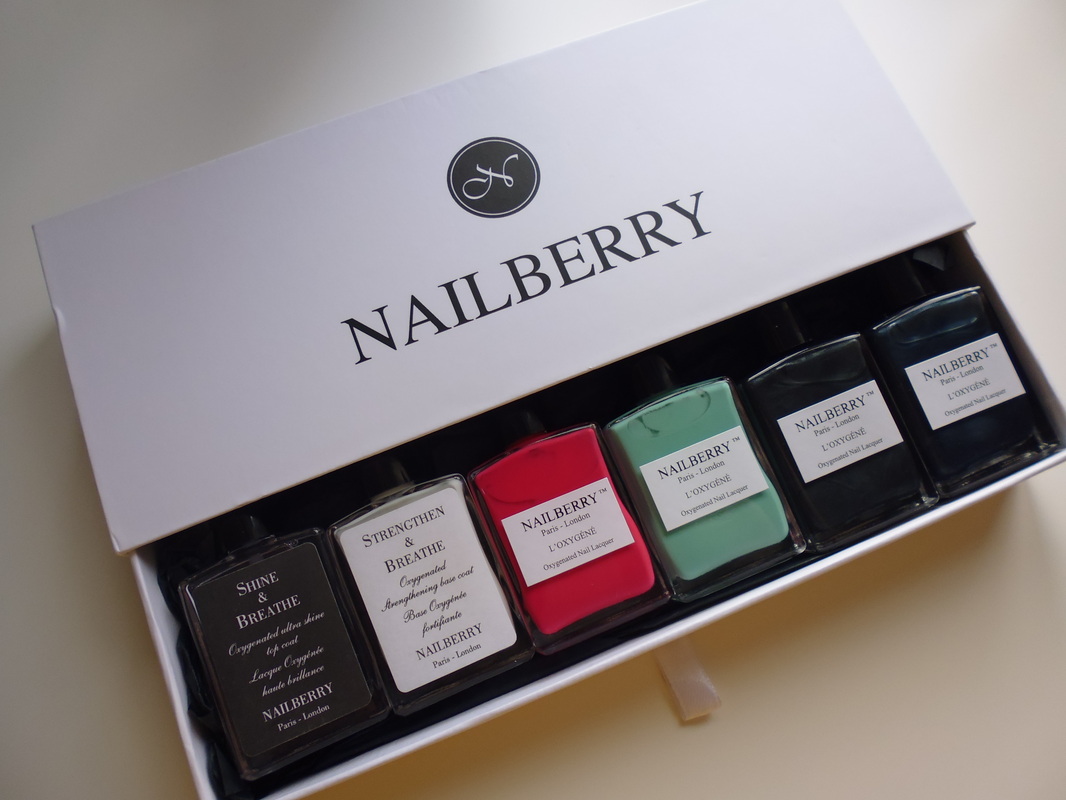 I have been dying to share with you some of my new polishes and first up are the Nailberry Collection which arrived last month and I have had endless enjoyment from. The 6 polishes came in a gorgeous presentation box which I have not yet taken them from and seem to have kept them in due to the fact I love that they are all together neatly in there. 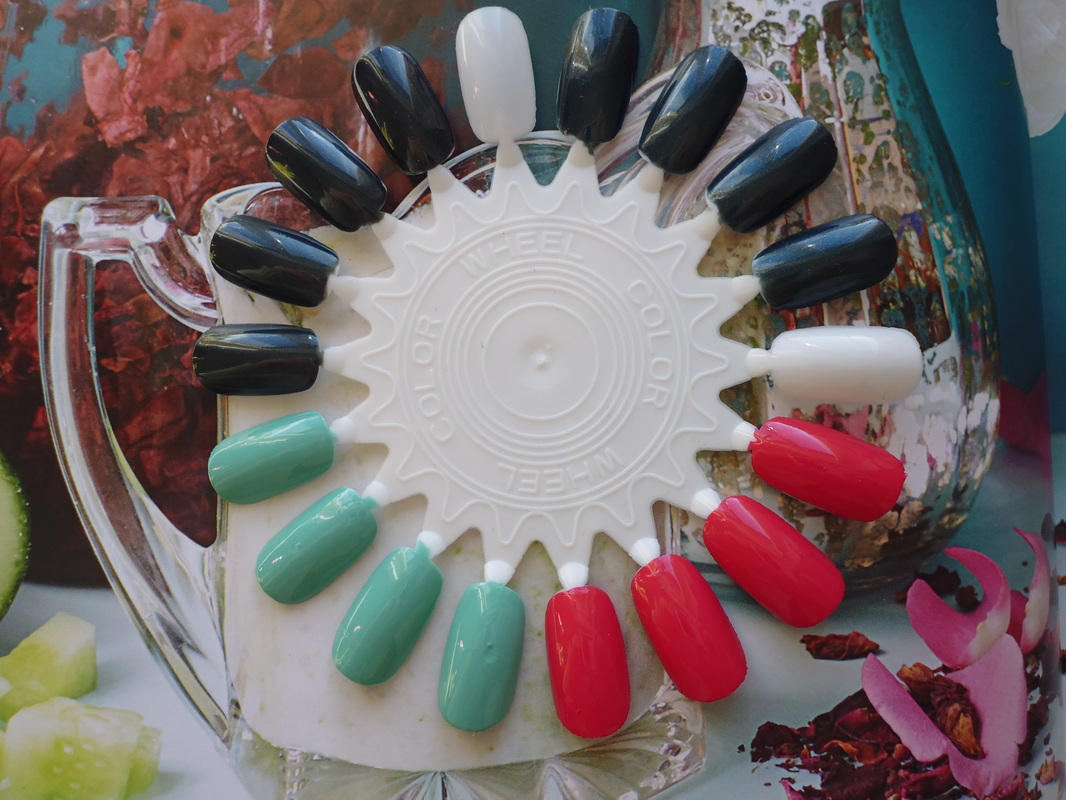 The six polishes included - 1.Oxygenated Ultra Shine Top Coat Cost - £17.00 I for one am always running out of top coat and find it one of the most important polishes of all so this for me was a need . If it was not for top coat for extra protection , the under polish would fade in colour and shine and most likely last no where near its usual expectancy . I find using a good quality top coat makes all the difference in whether the nail polish underneath stays put for longer and it helps me especially when I have my hands in the sink most of my days to maintain a neater nail for longer . This top coat is perfect for giving that crystal shine finish to your nail and works well at protecting them from those chips and fading. 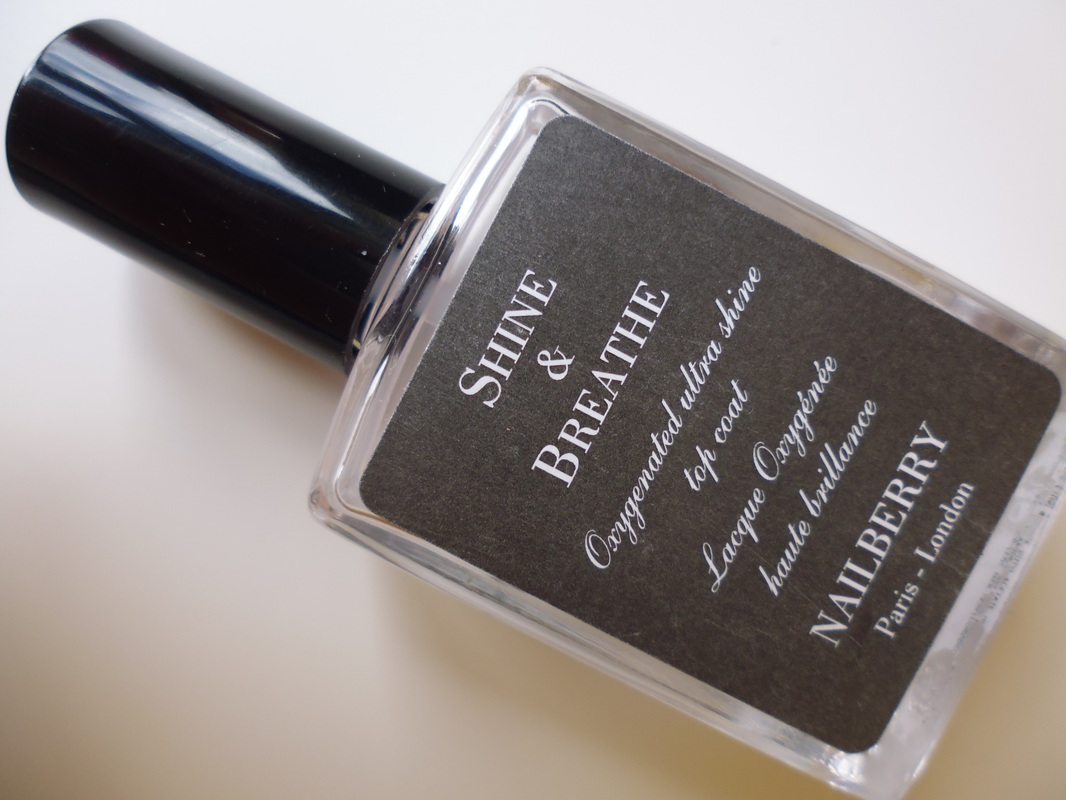 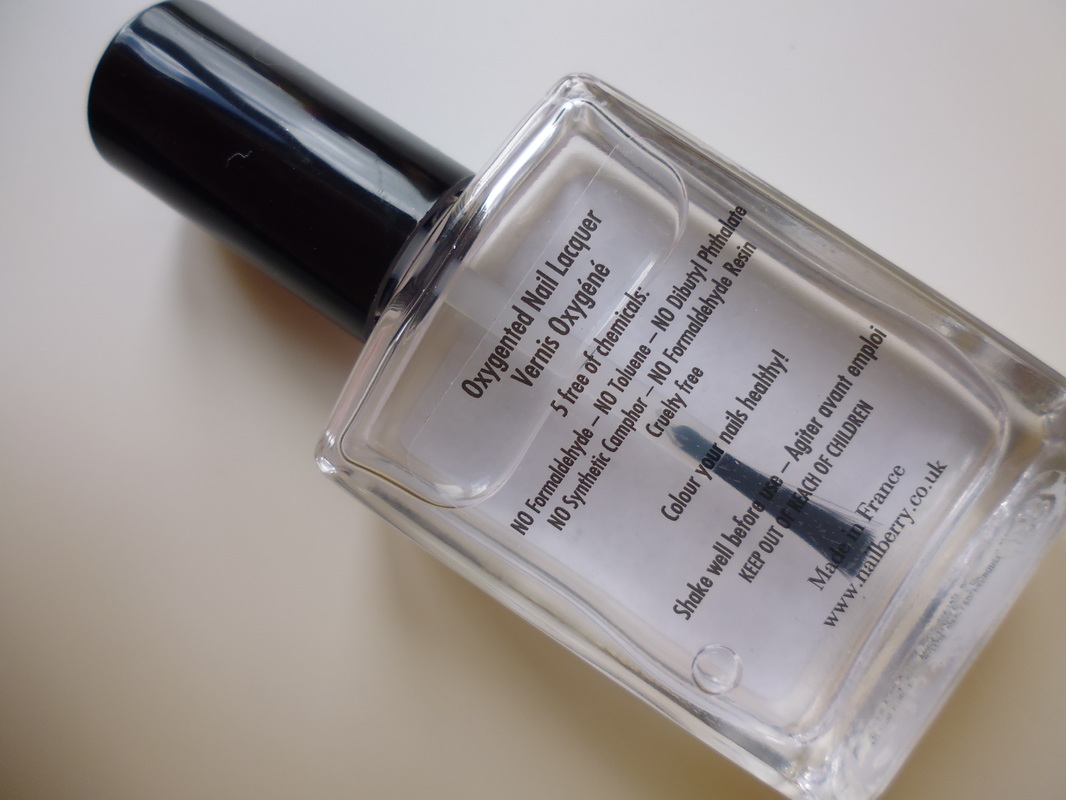 2.Oxygenated Strengthening Base Coat Cost - £14.50 To me it never even occurred to use a base coat until I spent a long summer wearing the brightest of shades on my toes and fingers and was suddenly surprised to find I had stained them with a mixture of sunshine and lack of education to needing an undercoat. I have been looking for a new one so this was my second obvious choice for that reason and I have been using it for the darker shades especially and had no signs of staining. This strengthening base is also fantastic for people like me , who are struggling to grow their nails or have problems with brittle nails and peeling. I currently seem to be getting the best out of my pregnancy for a change and my nails have become stronger through that but I usually have terrible nails that peel. Applying this before every application of polish is comforting that I will always have clean, stronger, thicker and smoother looking nails and this is why the added benefits make it worth every penny to me . 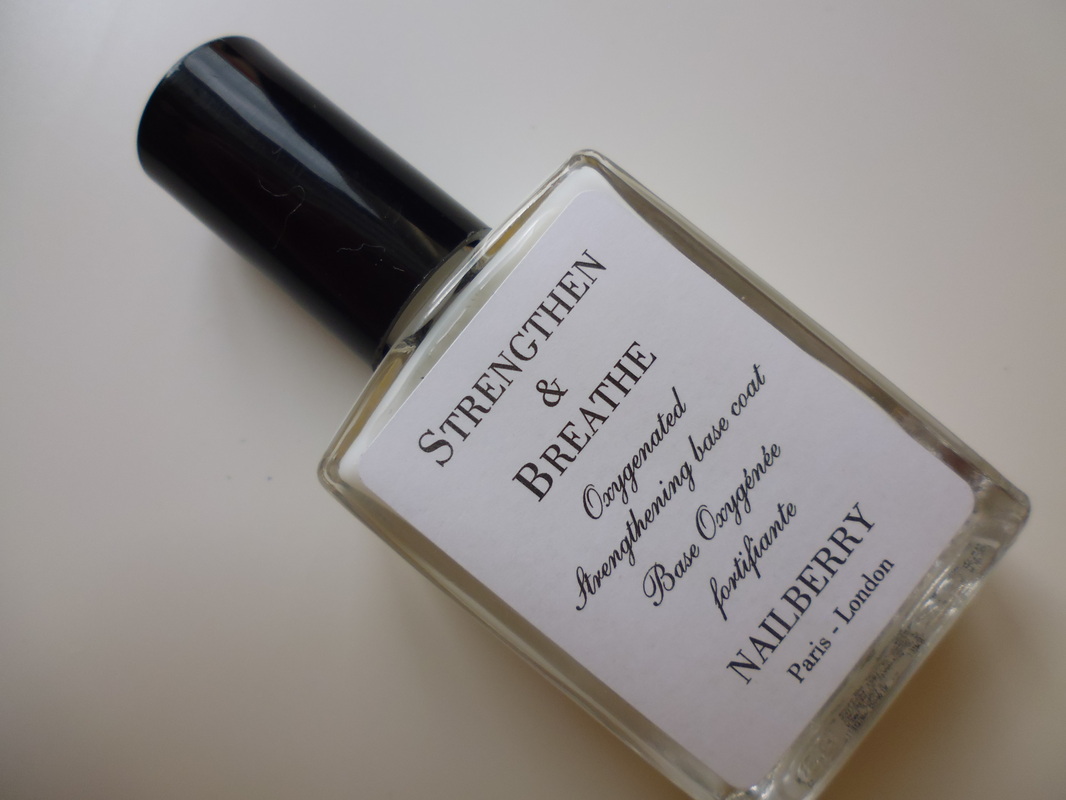  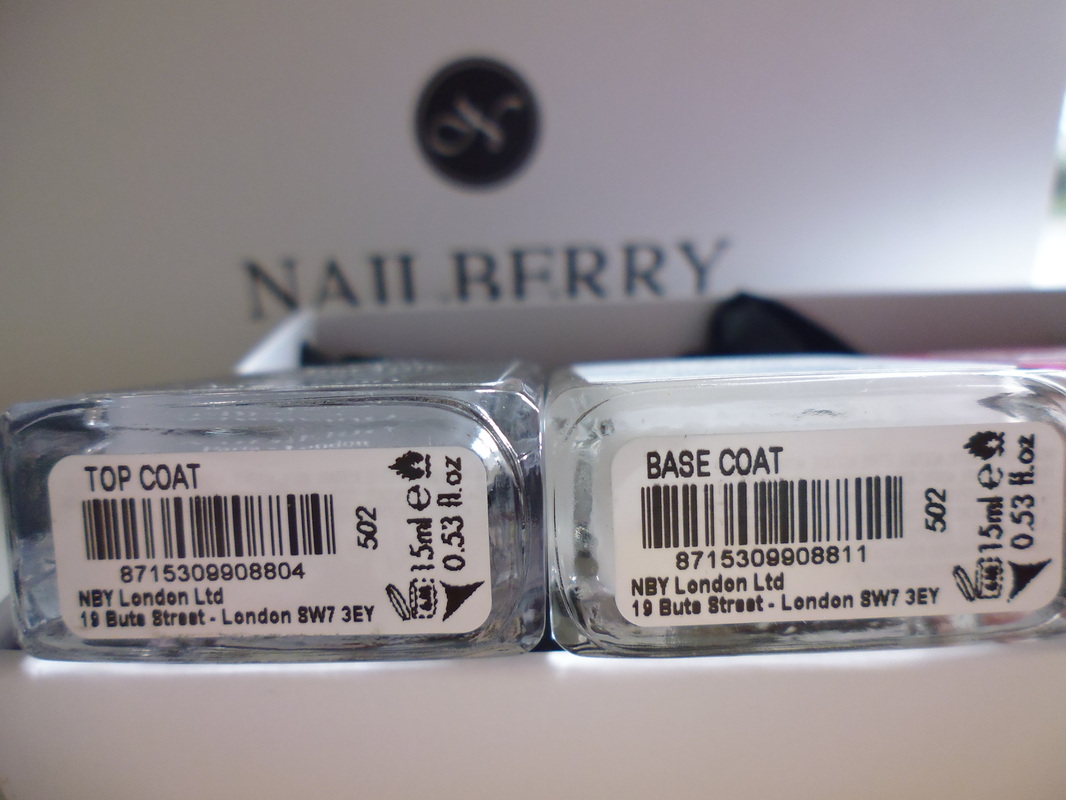 3. A Smart Cookie Cost - £13.50 I have always been a very big sucka for pink polishes, I tend to look at my pinks in my whole nail polish collection and always find space for that extra one which somehow looks slightly different in shade (or that is my excuse to get it anyway). This pink reminded me of the Hubba Bubba Sweets we used to have as kids and I knew it would be the perfect shade for Summer and Spring , in fact I have already been seen sporting it for the past two weeks , I simply can not pull myself away from the shade and because the quality is so fantastic, I have only had very little chipping from it in the whole two weeks wearing it so it was basically just a case of topping the polish up . The fact I only needed to use one coat of this was even better , usually I would have to add up to three coats to get a perfect coverage. Perfect for Spring this gorgeous shade really makes your nails stand out and is perfectly chic. 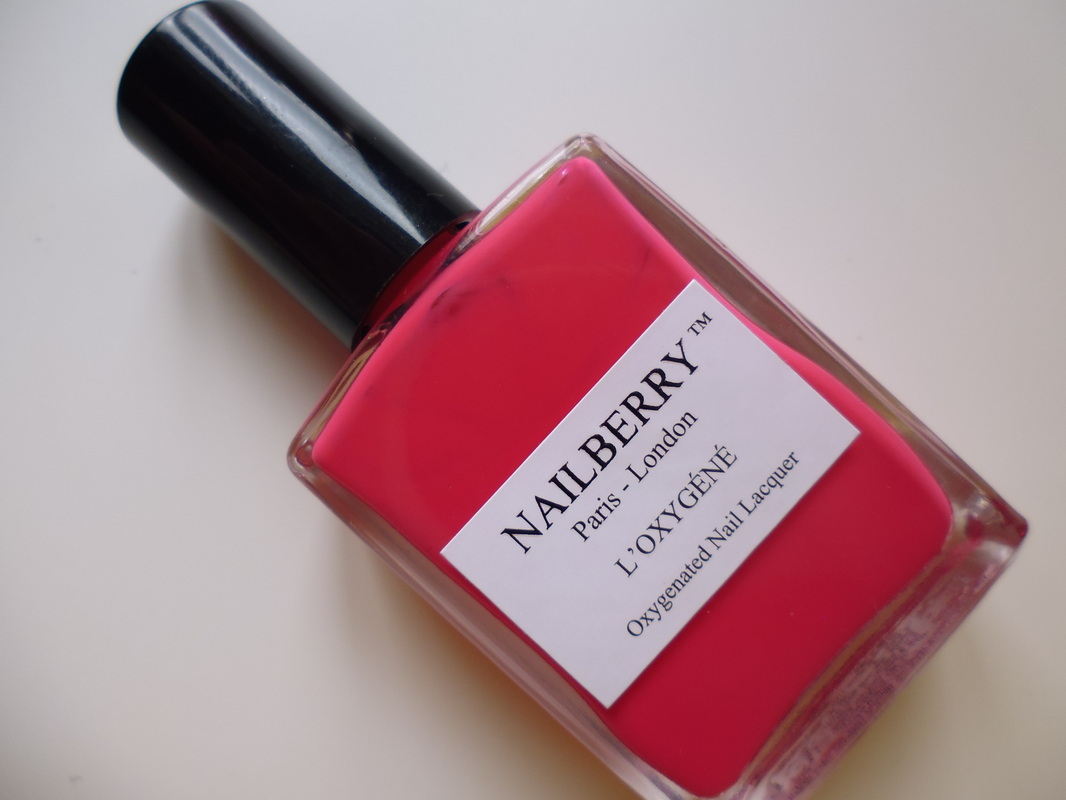 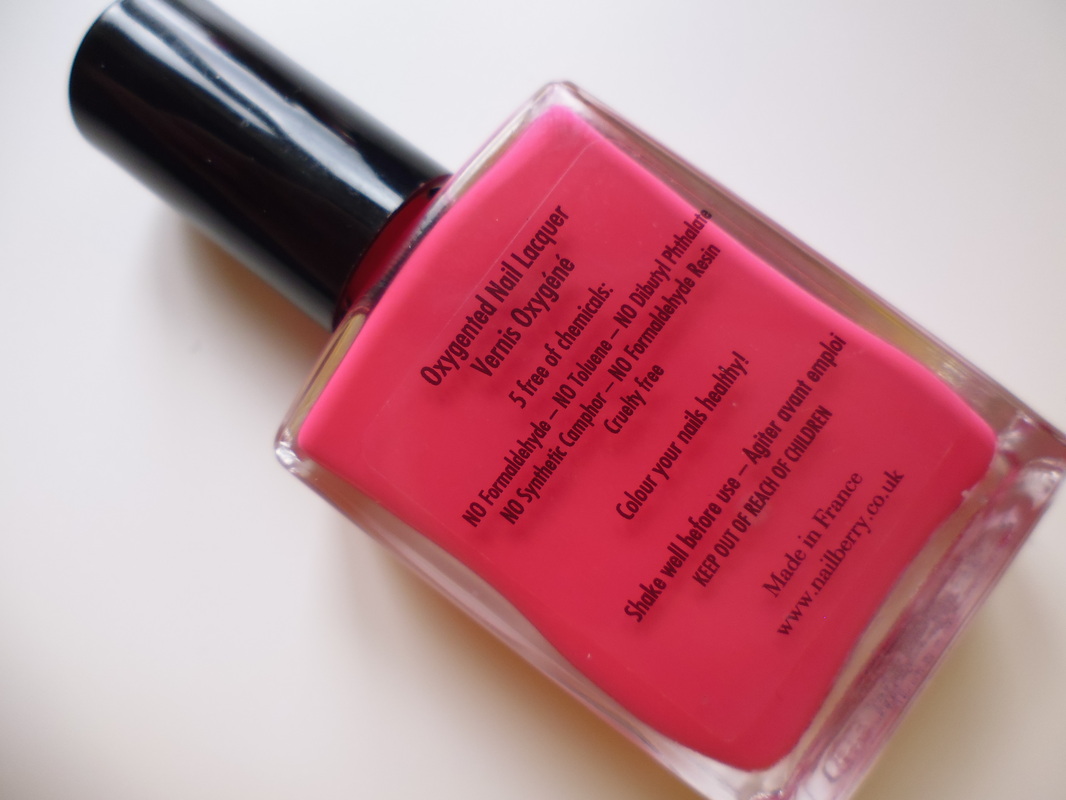 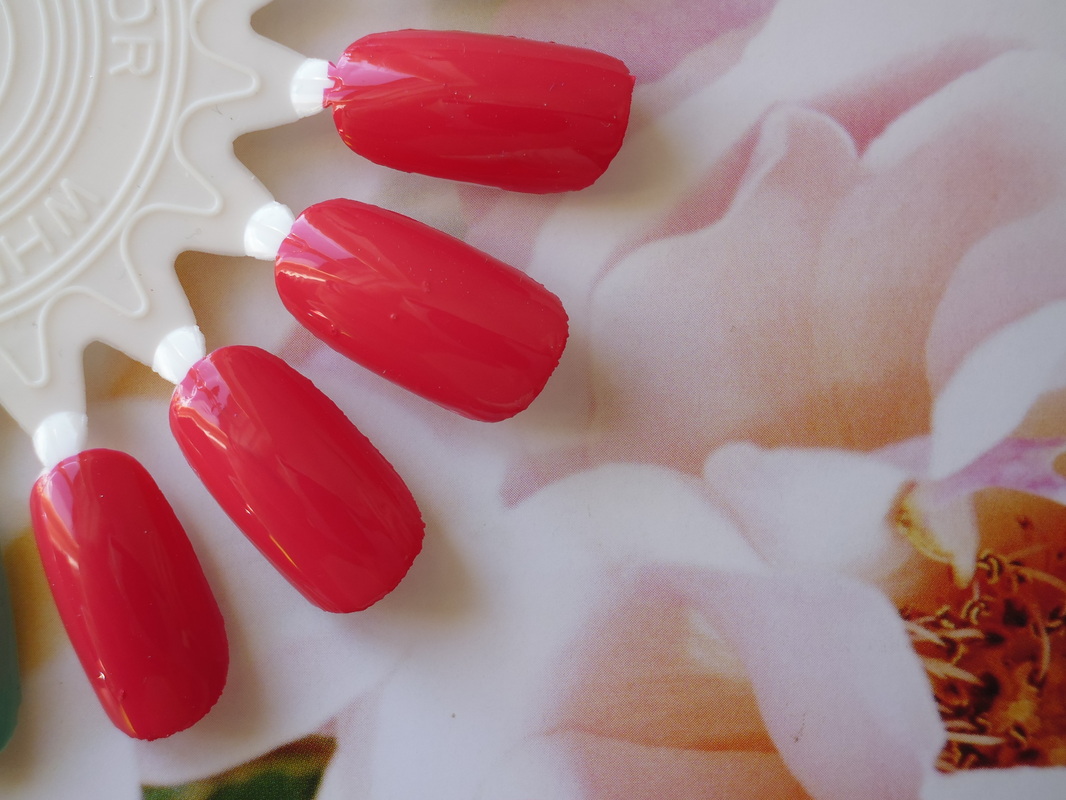 4. Baby Blue Cost - £13.50 Well I had the baby pink (smart cookie) , all I needed now was the Baby Blue , why not , this being pregnant has most certainly gone to my head so I had to get a pair . This polish is not quite the Baby Blue I was expecting though, not to the usual light shaded blue tone but more the green which usually does not appeal to me. This time however I was actually very excited to see that this polish was a mintish light green with a creamy look to it , definitely spring , Easter colour . With only two coats this polish looked utterly gorgeous and smooth and once again delivers a high shine finish with streak free application of their precision brush. 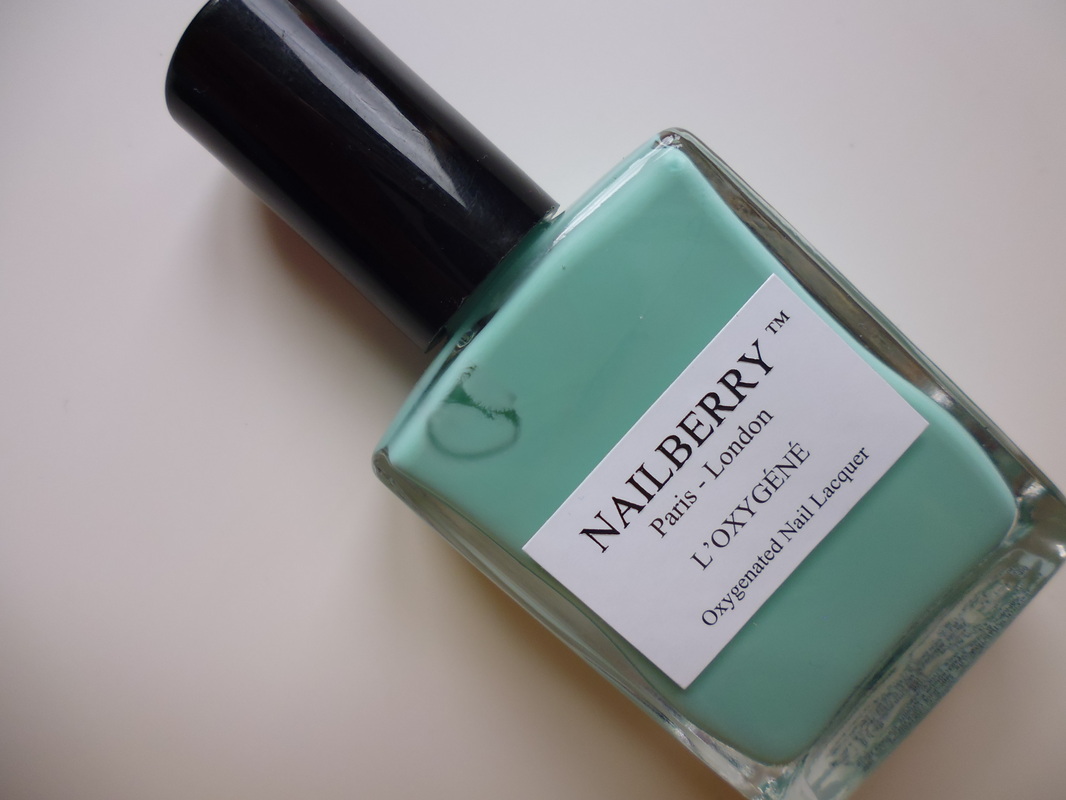  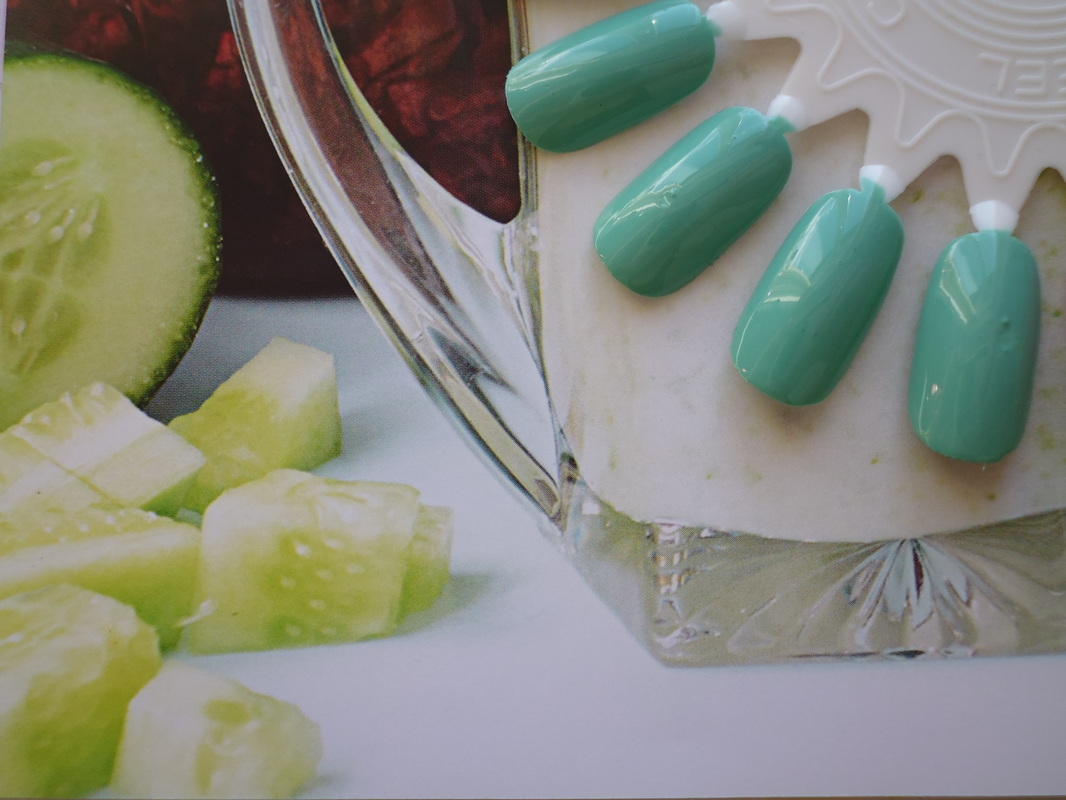  5. 50 Shades Cost - £13.50 There is no surprise as to the reasons why I bought this . Yes it was all the craze of that fascinating book '50 Shades Of Grey' and with the movie being released in March this year (around the time of picking my polishes) , I had that sudden urge to find out if this really did live up to the 50 Shades name. I think I was all in expecting a dark leatherette grey effect with this polish . On line the shade looked completely different to how I saw it in the bottle and on the nail . This polish has a very satin slate like finish , you see the grey blend in with the iridescent flecks which hides behind the dark colour . This sophisticated shade is also as elegant as it is ''50 Shades'' and I for one am loving the fantastic mix of shade in this polish, I simply have nothing like it. 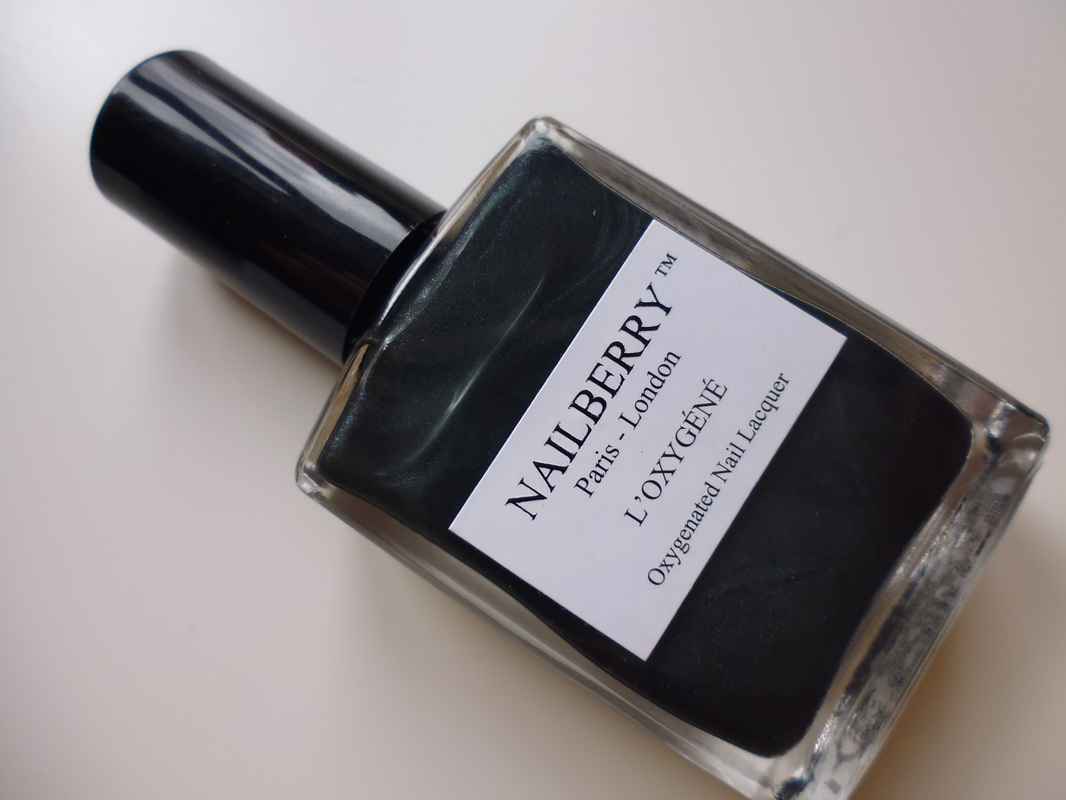 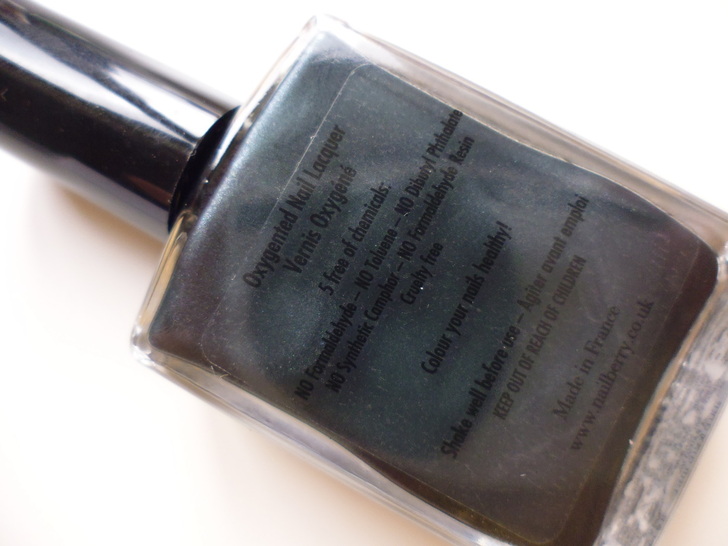 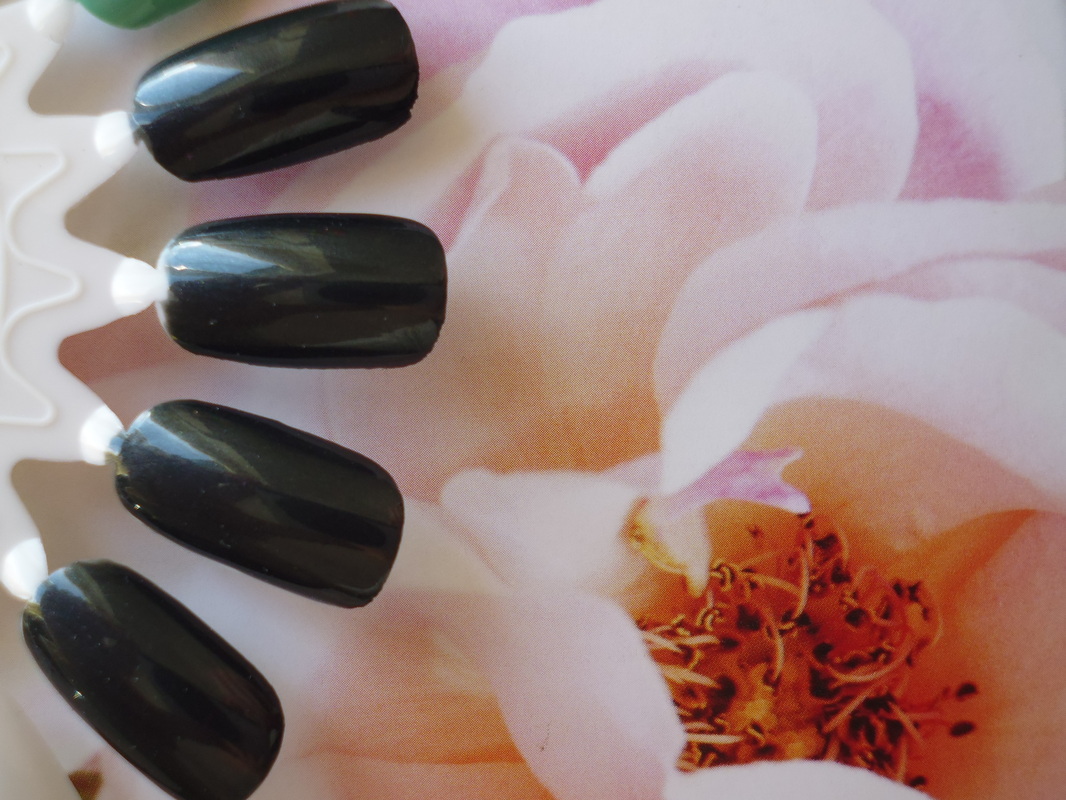 6. Storm Cost - £13.50 This was very similar looking to '50 Shades' but I found it looked more midnight sparkle blue hense why I went for this one. I remember going to a spa for my honeymoon and the lady put a gorgeous (what I could only describe as I have no idea what the polish was) midnight sparkle blue polish on my toes. It literally reminded me of a starry night and this is what Storm reminded me of but with a more hint of green to the colour . It is described as a sheer blue grey but to me resembles noting of the sort. I find more blue and forest green than grey in this polish with those gorgeous flecks of minute iridescent shimmers which when applied pops out like an aqua sea shade . I love this polish , It is a new one in my collection I do no have that matches like any other . This polish really does catch your eye and I will certainly be wearing this more in the Autumn /Winter days. 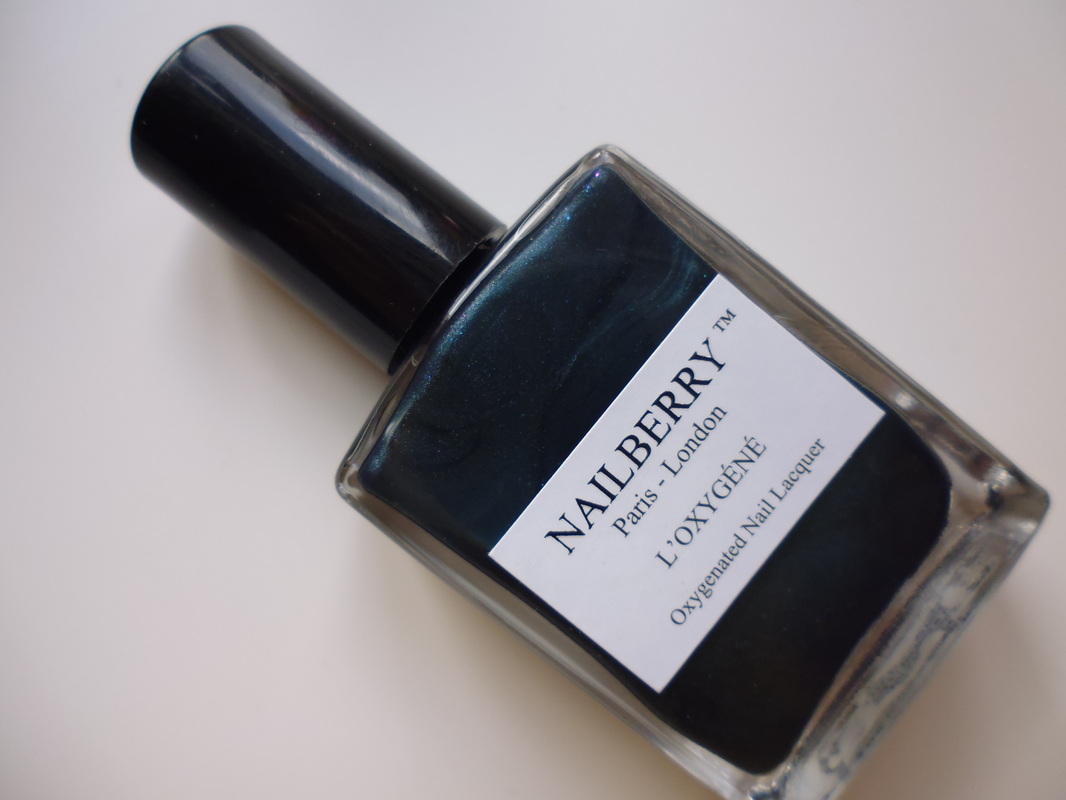 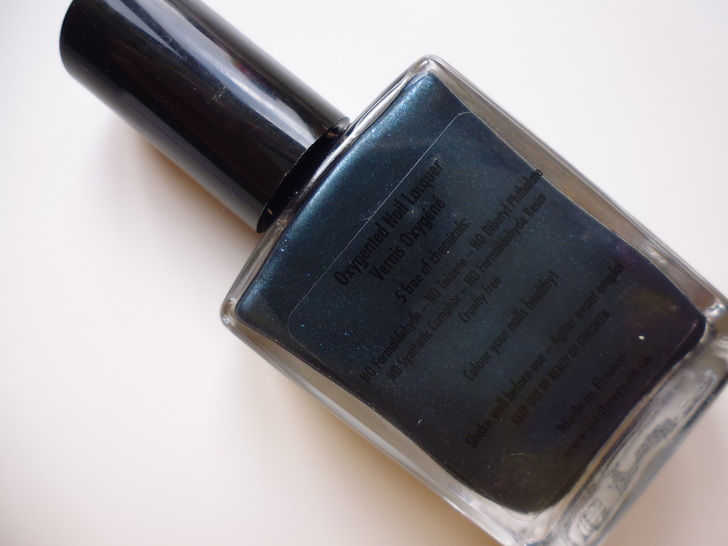 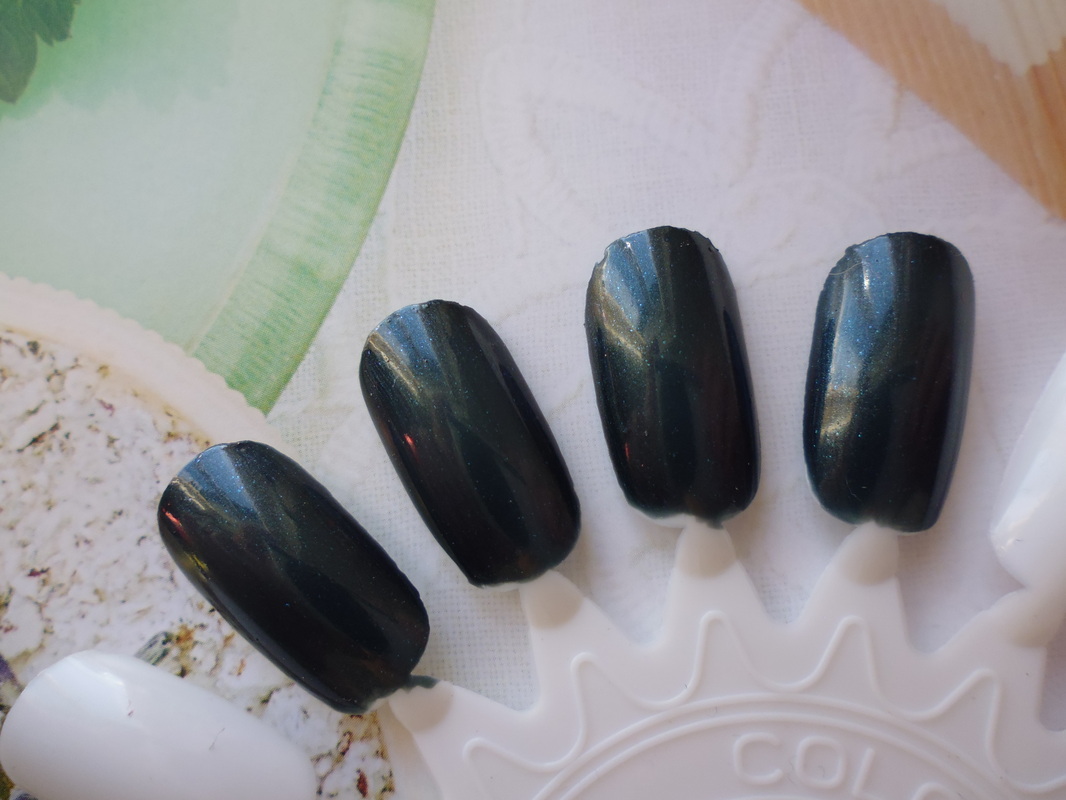 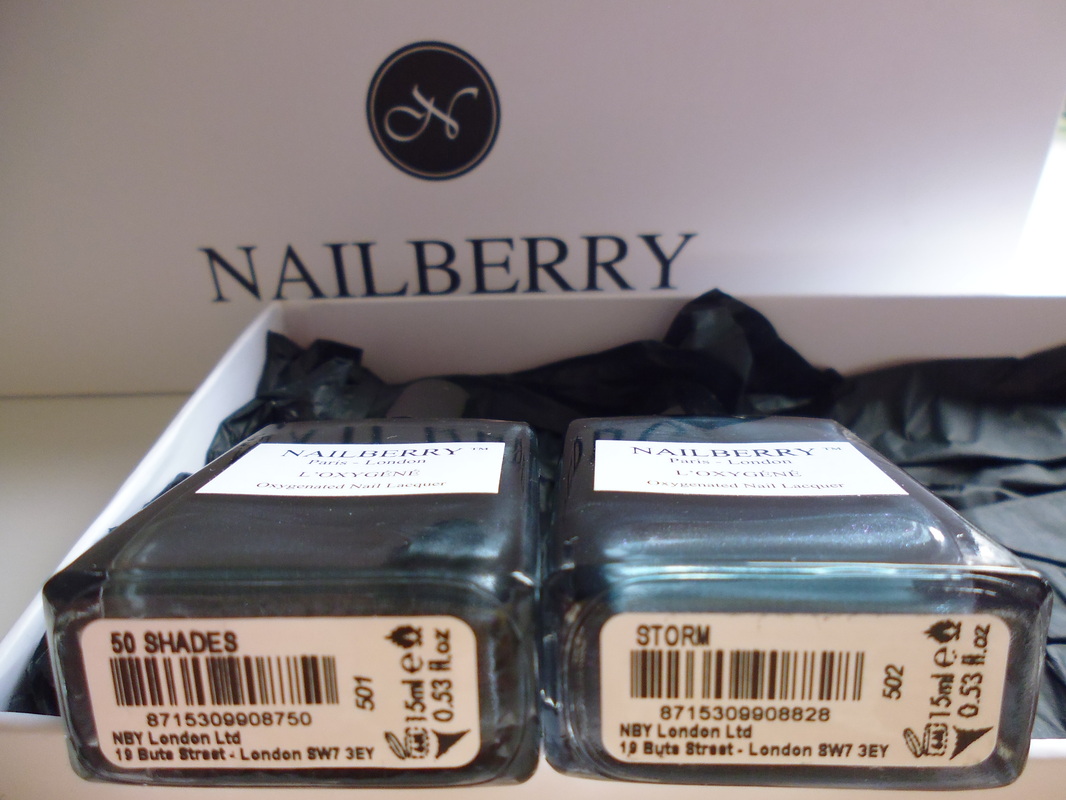 I have to admit , the Nailberry nail polishes have wowed me. It has been a long time, (since the Coca Cola OPI Collection in fact) that a nail polish actually wowed me and this is most certainly one of the High end brands that will be joining my most loved shades and extending in the near future. The polish has proved that to get that high shine finish, it only takes 1-2 coats of the polish with high precsion brush that is easy to handle and gives the streak free finish. The Brand does not compromise in quality in the different collections it has and with the gorgoeus sophisticated packaging , this makes something of a treat to own . Not only are these polishes a delight to own and wear but the added joy is that these polishes are free from chemicals. Nailberry nail polish qualities:
The downside to owning these polishes : I simply can not get enough of them , I need more . 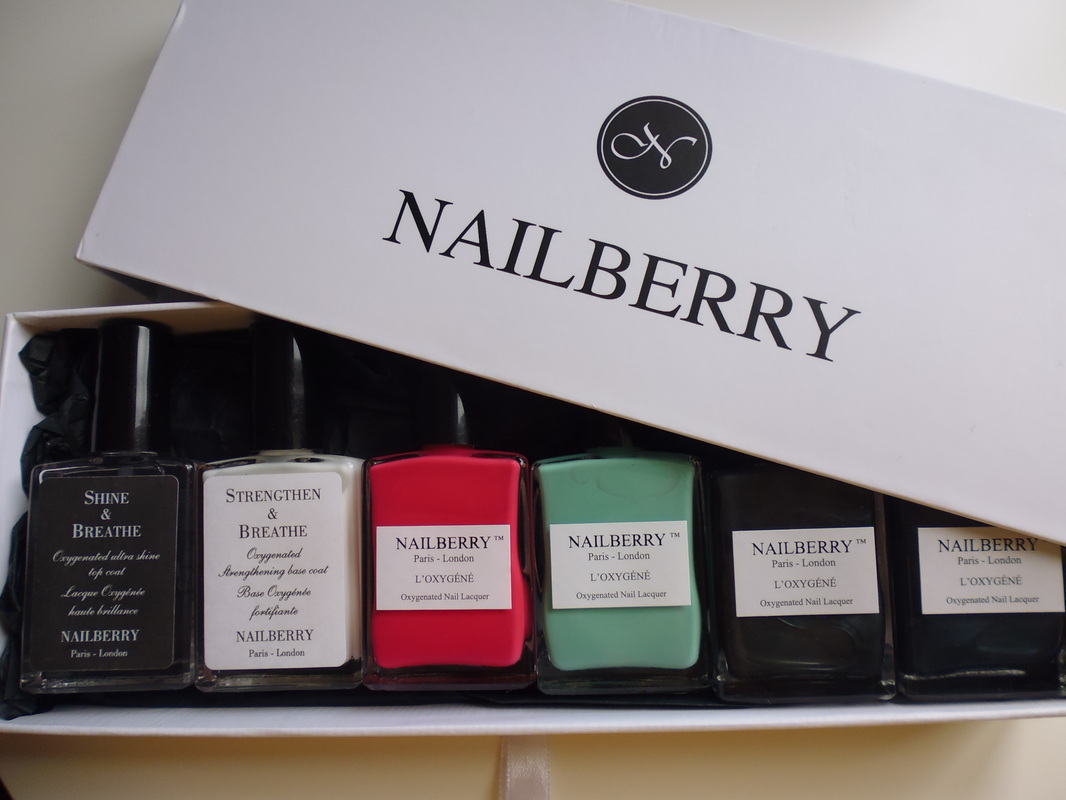 So I know some will not love the high price but it really is a fantastic brand and quality polish . What do you think of Nailbery?
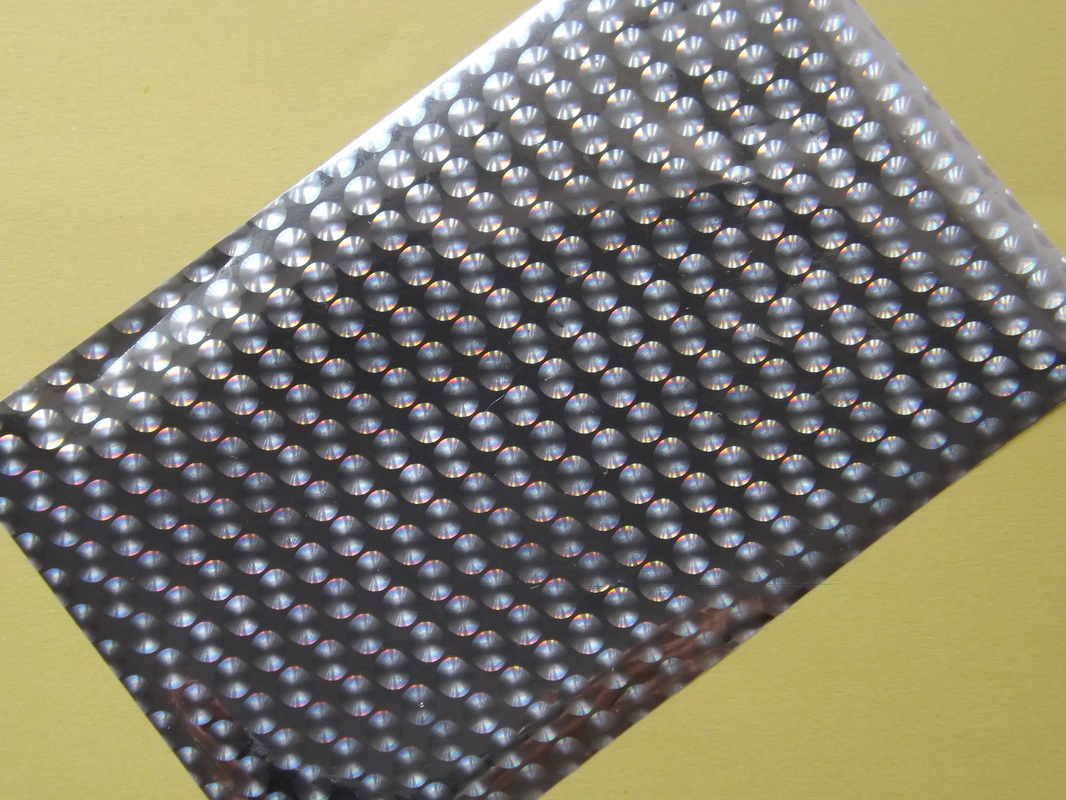 As I showed you yesterday, I was in the middle of an Easter Design for my nails and I tried to be brave by attempting the nail foil which has decided to jump out at me on the vanity table . Being the Magpie that I am and seeing it shine and glisten I quickly snatched it and wondered on how it actually worked and in the hurry I was in, I found eventually something sticky helped it to stick to my nails and so after a patchy start I decided to give it a real try today and so I have. Feeling in a pink mood, a little romantic at heart in my pregnant state of mind, I decided to go with just one nail , a contrast nail , not too much shine but enough to be noticable. Just take a look at how boring that plain nail looks although I am impressed with the polish itself (I will share with you which it is in an upcoming post ). 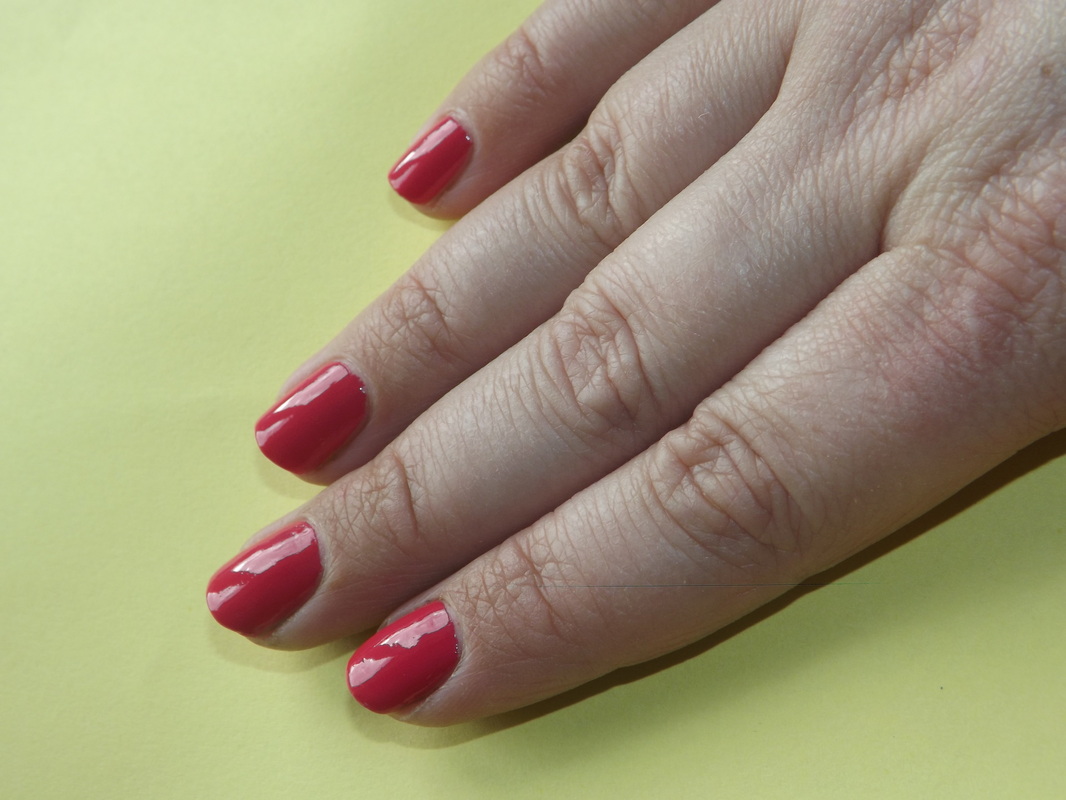 Instructions of how to use -
Here are my results- 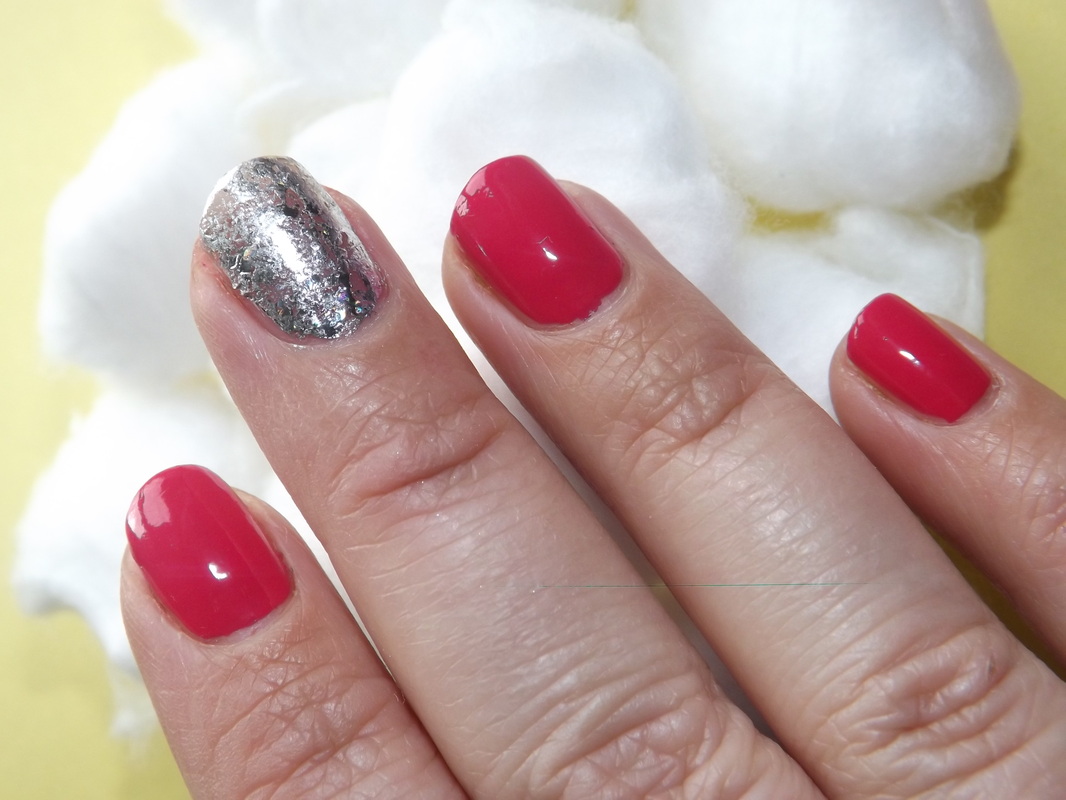 I absolutely love the finishing effect, it looks like I have had melted silver poured over my nails and would love these in other styles , I am very pleased with how it has turned out. I expected the foil to flake as soon as I peeled the sheet away or even fold as I applied a top coat but this was not the case as the foil stuck to the nail perfectly . 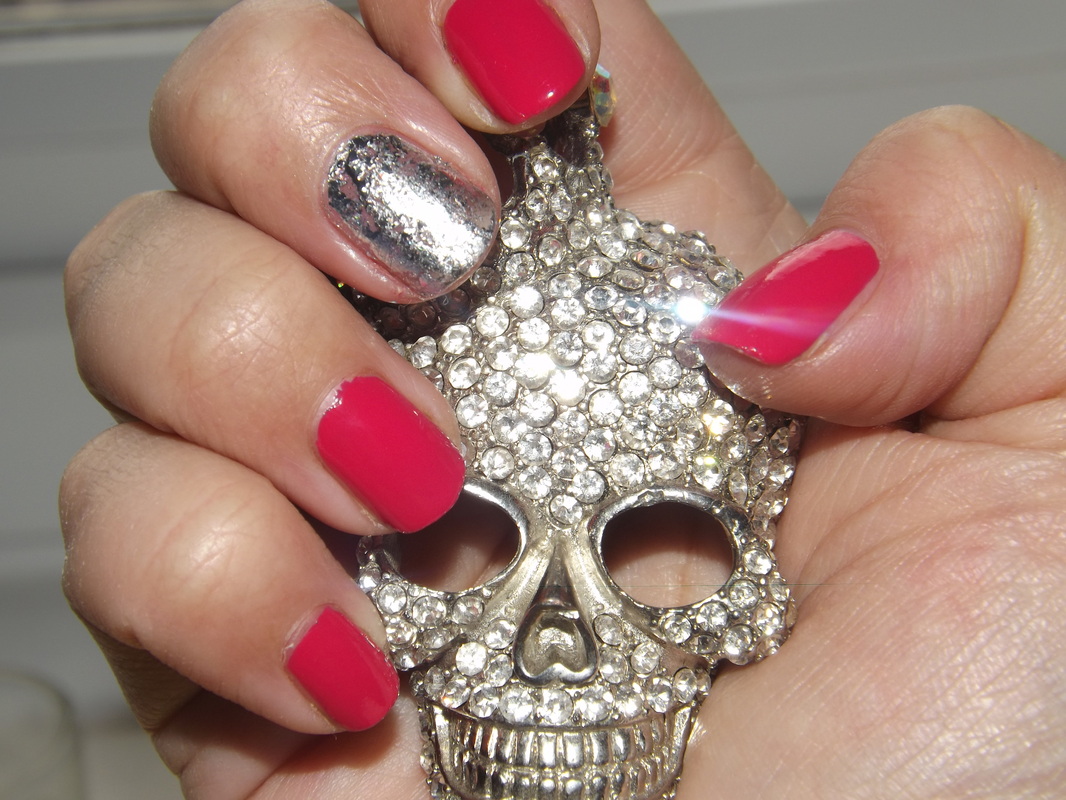 The foil was so easy to use but the application seemed a little hard for me , I think this is mainly down to the varnish I was using at first as it was not sticky enough (simply went from wet to dry in seconds so was no good for this ) .
I ended up having to use a very cheap clear topcoat instead before applying the foil on top. (I did not want to use colour) . The size of each foil sheet is 9cm by 6cm and you only get one sheet which will do you a full set of hands but if you are like me and only like the odd finger to be contrast, then this will last a lot longer and only 39p each is a bargain . They also do a whole range of different styles and colours of the nail foils such as the Glitter rainbow and Leopard print which look fantastic also . You can buy these from Charliesnailart.co.uk . Will you be giving them a try or have you already ? |
